
Follow the instructions to select the required till map.
On the map, click on the required button. It will turn opaque, and the 'Till map menu' window will display the button's existing properties:
Method 1
1. After clicking on the required button,
click on the dotted button ![]() next
to the 'Button Image' field. A selection of solid colours and images will
be displayed:
next
to the 'Button Image' field. A selection of solid colours and images will
be displayed:
2. Click on one of the solid colours that are displayed.
3. You will be automatically returned to the selected till map which will now display the button in its new livery.
Method 2
1. After clicking on the required button, tick the check box next to 'Use Generic Image'.
2. Click anywhere on the colour displayed next to 'Back Colour' to reveal a colour palette as shown below:

3. Select a colour from the palette. It will be placed simultaneously in the 'Back Colour' field, and onto the selected button.
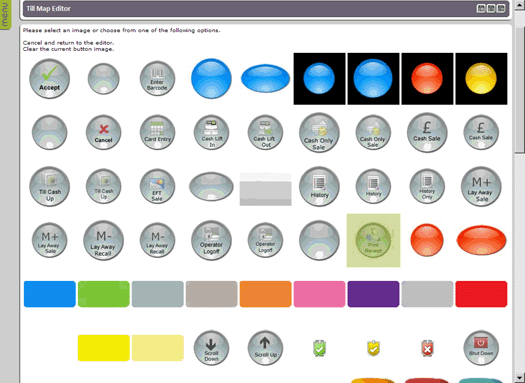
1. After clicking on the required button,
click on the dotted button ![]() next
to the 'Button Image' field. A selection of solid colours and images will
be displayed:
next
to the 'Button Image' field. A selection of solid colours and images will
be displayed:
2. Use the scroll bar on the right of this window to see all of the images that are available.
3. Click on the required image. You will be returned to the selected till map which will now display the button in its new livery.
Notes: |
In the 'Image Stretch' field, select 'Clip', 'Isometric', or 'Stretch' depending on how you would like the image to appear on the till map. In the 'Back Style' field, If transparent is selected, any white in the button image will be replaced with transparent pixels, allowing content under the image to be seen. |
After you have finished making changes to this till map, you must save your changes.
![]()